Core Web Vitals are the three user-centric performance metrics—Largest Contentful Paint (LCP), Interaction to Next Paint (INP), and Cumulative Layout Shift (CLS)—that Google uses to quantify the real-world loading experience of a webpage. For WordPress sites, these metrics are not abstract rankings signals; they are direct measures of how quickly your pages render primary content, how responsive your site feels during user interaction, and how visually stable the page remains while assets load. This guide provides two distinct paths to optimizing these metrics: one for users who need results without touching code, and one for developers who want fine-grained control at the theme and server level.
The Baseline: Measuring Where You Stand
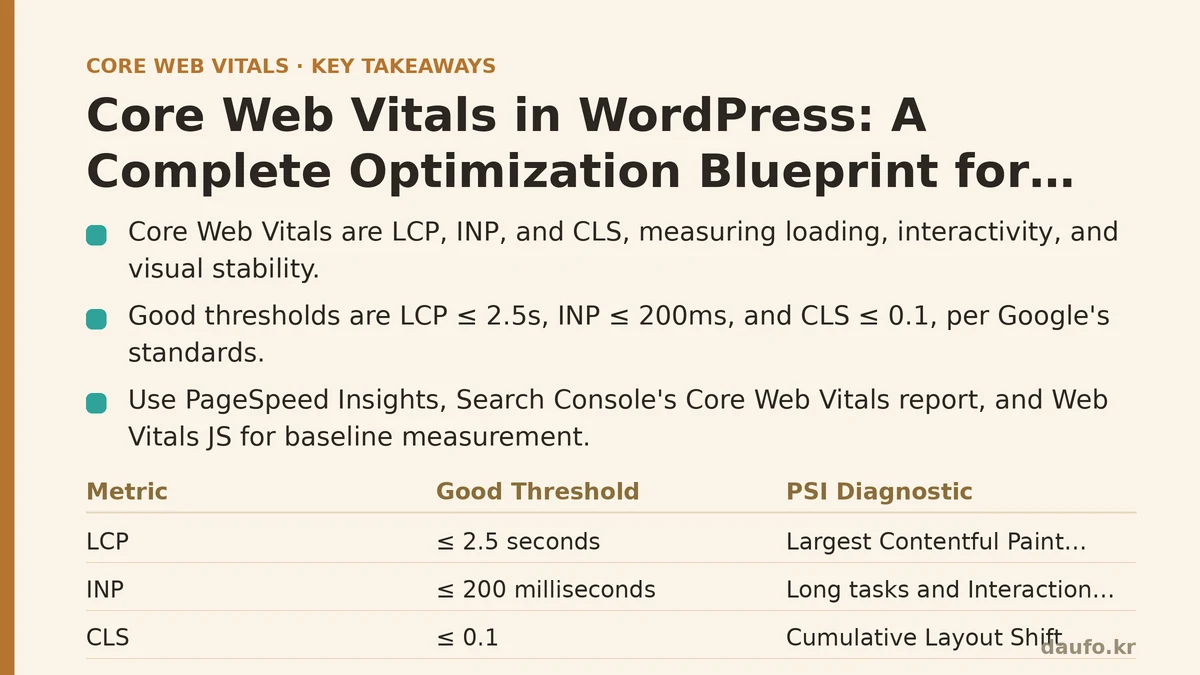
Before any optimization work begins, you need a reliable measurement baseline. The WordPress admin dashboard does not provide this natively, so you must use external tools.
Recommended tools for measurement:
- PageSpeed Insights (PSI): This laboratory tool analyzes a URL using a simulated mobile device on a fast connection. It provides a diagnostic breakdown of every performance issue, categorized by the metric it affects.
- Google Search Console’s Core Web Vitals report: This field data report shows how real users across different network conditions experience your site over the past 28 days. It groups URLs by status (Poor, Needs Improvement, Good) and highlights the specific metric causing the problem.
- Web Vitals JavaScript library: For real-time measurement during development, this library can log metric values to the browser console as you navigate your own site.
Key measurement targets:
| Metric | Good Threshold | Actionable Diagnostic in PSI |
|---|---|---|
| LCP | ≤ 2.5 seconds | “Largest Contentful Paint element” (tells you which HTML element is the LCP candidate) |
| INP | ≤ 200 milliseconds | “Long tasks” and “Interaction to Next Paint” (tells you which scripts block the main thread) |
| CLS | ≤ 0.1 | “Cumulative Layout Shift” (tells you which elements shift and by how much) |
Once you have your baseline numbers, you can identify which of the two optimization tracks below matches your skill level and hosting environment.
Track A: The Beginner’s Toolkit (Plugin-Based Optimization)
This track uses established plugins to handle optimization tasks without requiring access to your theme’s source code. It is the fastest route to improvement for standard WordPress installations running on shared or managed hosting.
Step 1: Caching and Page Delivery
The problem: Every page request triggers PHP execution and database queries. This adds server response time (TTFB), which directly extends LCP.
The solution: A caching plugin creates static HTML copies of your pages and serves those copies to repeat visitors, bypassing the PHP execution entirely.
Recommended setup with a leading caching plugin:
- Page Cache: Enable it. Set the cache lifetime to 1 week. Test your site after enabling to ensure no dynamic elements (like a cart count) break.
- Browser Cache: Enable it. This sets caching headers for static assets (images, CSS, JS) so returning visitors don’t re-download them.
- GZIP Compression: Enable it. This shrinks HTML, CSS, and JS file sizes by up to 70% before they are sent over the network.
- Move the CSS/JS to the footer: If your plugin offers this option, use it. This is a beginner-safe way to reduce render-blocking resources.
Step 2: Image Optimization
The problem: Large, unoptimized images are the most common cause of poor LCP scores. A 2MB hero image takes seconds to download on a 4G connection.
The solution: Compress images and serve them in modern formats.
In WordPress versions 5.5 and later, native lazy-loading is enabled for images. To go beyond that:
- Install an image optimization plugin that automatically compresses images upon upload. Configure it to target a maximum file size of 100KB for content images.
- Force WebP conversion for all new uploads if your plugin supports it. WebP files are typically 25-35% smaller than JPEG or PNG files at the same visual quality.
- Resize the hero image: The LCP element is often a large banner. Ensure the uploaded version is no larger than 1920px wide and is compressed to under 150KB.
Step 3: Render-Blocking JavaScript and CSS
The problem: The browser stops parsing your HTML to download and execute JavaScript files found in the <head> section. This delays the moment the main content becomes visible.
The solution: Defer or delay non-critical JavaScript.
- Using your caching plugin’s “Defer JS” setting: This adds the
deferattribute to all<script>tags, telling the browser to download them in the background and execute them only after the HTML parser has finished. - Using a “Delay JavaScript” feature: Some caching plugins (like WP Rocket) let you delay scripts until a user interaction (scroll, click, keypress). This is a robust technique for analytics and social widgets that you do not need immediately.
- For CSS: Use the “Remove Unused CSS” feature if available, which scans your pages and strips out styles from your theme and plugins that are not used on that specific page. If this is not an option, ensure your theme is not enqueuing the full site-wide stylesheet on every single page.
Track B: The Developer’s Playbook (Code-Level Control)
This track assumes you have access to your child theme’s functions.php, can edit the theme’s templates, and have a basic understanding of how WordPress enqueues assets. These techniques provide more predictable results and avoid the bloat that some plugins add.
Technique 1: Inline Critical CSS for the LCP Element
The problem: The browser must wait for a full render-blocking CSS file (often >50KB) before it can paint the hero image or headline. This waiting period is pure dead time for LCP.
The solution: Extract the CSS rules that apply above the fold (the top 600-800px of the viewport) and embed them directly in the <head> as a <style> tag. Then load the full stylesheet with the media="print" trick to make it non-render-blocking.
Implementation in WordPress:
- Install a plugin like “Autoptimize” or “Perfmatters” that offers critical CSS generation, OR use a critical CSS generator tool to output the CSS for your homepage.
- Instead of relying solely on a plugin, you can hardcode the critical CSS in your theme using the
wp_headhook. The following snippet shows how to print a file namedcritical.cssfrom your child theme:
<?php
// functions.php
add_action('wp_head', function() {
    $critical_css_path = get_stylesheet_directory() . '/critical.css';
    if (file_exists($critical_css_path)) {
        echo '<style>' . file_get_contents($critical_css_path) . '</style>';
    }
});
- Then, force your main stylesheet to load asynchronously using the
style_loader_tagfilter:
<?php
add_filter('style_loader_tag', function($html, $handle) {
    if ($handle === 'your-theme-main-style') {
        $html = str_replace("media='all'", "media='print' onload='this.media=\"all\"'", $html);
    }
    return $html;
}, 10, 2);
Why this matters: By inlining the ~5-10KB of CSS needed for the header and hero section, you cut the critical rendering path from two network requests (HTML + CSS) down to just one. This alone can shave 0.5 to 1 second off LCP on slower connections.
Technique 2: Preload the LCP Image for Immediate Fetch
The problem: The LCP image is often discovered by the browser far down the HTML document, after several other requests have already been initiated. The browser fetches it based on file order, not importance.
The solution: Use the <link rel="preload" as="image"> directive to tell the browser to start downloading the LCP image as soon as the HTML is parsed, without waiting for the rest of the document.
Implementation:
<?php
// functions.php
add_action('wp_head', function() {
    if (is_front_page() || is_home()) {
        echo '<link rel="preload" as="image" href="https://example.com/wp-content/uploads/2026/hero-image.webp" fetchpriority="high">';
    }
});
Best practice: Only preload the single image that is the primary LCP candidate. Preloading multiple images defeats the purpose and wastes bandwidth. Use fetchpriority="high" to signal criticality, and consider setting the image URL dynamically based on the page template.
Technique 3: Eliminate Layout Shifts (CLS) with Reserved Space
The problem: When an image loads, a banner loads, or a font swaps in, it pushes other content down the page. This is a measured layout shift.
The solution: Reserve the exact dimensions of every media element before it loads. The browser allocates the space, so nothing shifts when the asset arrives.
Implementation in your theme templates:
- For images: Always include the
widthandheightattributes in your<img>tags. WordPress does this automatically for images inserted via the media library, but you must ensure your custom template code does the same.
<?php
// template-part.php
$image = get_the_post_thumbnail_url(null, 'large');
if ($image) {
    // Retrieve dimensions dynamically
    $attachment_id = get_post_thumbnail_id();
    $metadata = wp_get_attachment_metadata($attachment_id);
    if ($metadata && isset($metadata['width'])) {
        echo '<img src="' . esc_url($image) . '" width="' . esc_attr($metadata['width']) . '" height="' . esc_attr($metadata['height']) . '" alt="' . esc_attr(get_the_title()) . '">';
    }
}
- For lazy-loaded images: Do not use a
1pxplaceholder oraspect-ratio: auto;in CSS alone. Ensure the HTML element still has explicit dimensions, and reserve space using CSSaspect-ratioproperty on the wrapper:aspect-ratio: 16 / 9;. - For web fonts: Use the
font-display: swapCSS property in your@font-facedeclaration (most themes include this via a plugin or theme customization). However, to prevent shifting from the font swap itself, consider usingfont-size-adjustor preloading the primary font file with<link rel="preload" as="font">.
Technique 4: Optimizing INP by Removing JavaScript Blocking
The problem: INP measures the delay between a user tap or click and the visual response. This delay is caused by long-running JavaScript tasks on the main thread (event handlers, large library calls, or parser work).
The solution: Reduce the amount of JavaScript that runs on page load, and break up any long tasks that remain.
Implementation steps:
- Audit your enqueued scripts: In
functions.php, use thewp_enqueue_scriptshook to list all scripts and their dependencies. Identify any that are not strictly necessary for the initial render. - Remove unnecessary jQuery dependencies: Many older themes load jQuery for simple functionality (like a menu toggle) that modern vanilla JavaScript can handle in 10 lines. Replace those calls with native
document.addEventListener('click', ...). - Defer all non-critical scripts: Use the
deferattribute on all scripts except those that must run synchronously. WordPress does not adddeferby default. You can add it via a filter:
<?php
add_filter('script_loader_tag', function($tag, $handle) {
    // Do not defer this specific admin script
    if ($handle === 'jquery-core') {
        return $tag;
    }
    return str_replace(' src', ' defer src', $tag);
}, 10, 2);
- Use inline event handlers cautiously: If you have custom JavaScript that runs on every page load, wrap it in a
DOMContentLoadedlistener only if it needs the DOM. For quick interactions like a mobile menu toggle, the code can run immediately without waiting for the entire document.
Choosing Your Path: A Practical Decision Table
| Optimization Level | Best For | Time to Implement | Expected LCP Impact | Expected INP Impact | Expected CLS Impact |
|---|---|---|---|---|---|
| Track A (Plugins) | Non-technical site owners, shared hosting | 1-2 hours | Moderate (-0.5 to -1.0s) | Low to Moderate | Low |
| Track B (Code) | Developers, sites on managed/VPS hosting | 1-2 days | High (-1.0 to -2.0s) | High (50-100ms reduction) | High |
| Hybrid Approach | Most WordPress sites | 2-4 hours (plugins) + 1 day (code) | High | High | High |
The hybrid approach is the most reliable: use a caching plugin for baseline caching and image compression (Track A, Steps 1-2), then implement the critical CSS and LCP preload techniques (Track B, Techniques 1-2) for the final push to a “Good” score across all three metrics.
Validating Your Changes
After implementing changes, repeat your initial measurements. Do not rely on a single test; run PageSpeed Insights three times and take the median score. Additionally, check the Google Search Console report after two weeks of real traffic to confirm the improvements hold under real-world network variability.
The web performance landscape evolves quickly. Your site’s theme and plugin updates will periodically invalidate your optimizations. Schedule a monthly review of your Core Web Vitals report. When you see a regression, revisit the relevant technique above—the fix is usually a single filter or a resized image. Start with the measurement tools, apply the fixes for your worst metric first, and validate each change before moving to the next.
Related guides: Core Web Vitals Optimization for Finance and Banking Websites: A Troubleshooting Checklist, Next.js Performance Optimization: Five Priority Fixes That Move Your Core Web Vitals, and Common Core Web Vitals Mistakes Developers Make (And How to Fix Them).
🔗 Recommended Reading
- How to Enable Browser Caching on Your Website: A Beginner's Step-by-Step Tutorial
- Web Performance Monitoring Tools Compared: Lighthouse, PageSpeed Insights, and WebPageTest
- CDN vs. Origin Server: Which to Optimize First for Latency
- Common Mistakes That Break Web Font Performance and How to Fix Them
- Site Speed Optimization for Fintech Websites: Balancing Security, Compliance, and Performance