By the end of this guide, you’ll be able to identify sections of your page that are wasting rendering time, apply the correct contain value to isolate them, and use content-visibility to skip rendering work for content users haven’t scrolled to yet. These are small CSS changes with outsized effects on Interaction to Next Paint and long-task duration, and most teams never touch them because the browser rarely tells you they’re missing.
Here’s the underlying issue: when the browser recalculates layout or repaints part of a page, it doesn’t always know how far that recalculation needs to spread. A single DOM change deep inside a sidebar widget can, in the worst case, force the browser to re-check layout for the entire document. CSS containment exists to draw a boundary around that work and tell the rendering engine, in effect, “nothing that happens in here affects anything out there.” The following steps walk through how to apply that boundary correctly.
Step 1: Understand What Triggers Expensive Rendering Work
Before applying containment, it helps to know what it’s protecting against. Every time the DOM or styles change, the browser may need to run some combination of:
- Style recalculation — figuring out which CSS rules apply to which elements.
- Layout (reflow) — computing the size and position of boxes on the page.
- Paint — filling in pixels for those boxes.
The expensive part is scope. Layout, in particular, is not always local. A change to one element’s height can shift every sibling below it and, depending on the CSS involved, ripple upward and outward through ancestors and even distant parts of the document. On a page with thousands of DOM nodes — a long product listing, a data table, a comment thread — this ripple effect is where jank comes from, even when the actual visual change is tiny.
Open DevTools, go to the Performance panel, and record an interaction that updates part of a busy page (adding an item to a list, expanding a card). Look at the “Layout” and “Recalculate Style” entries in the flame chart. If their duration seems disproportionate to the size of the visible change, containment is likely to help.
Step 2: Learn the Four Containment Types
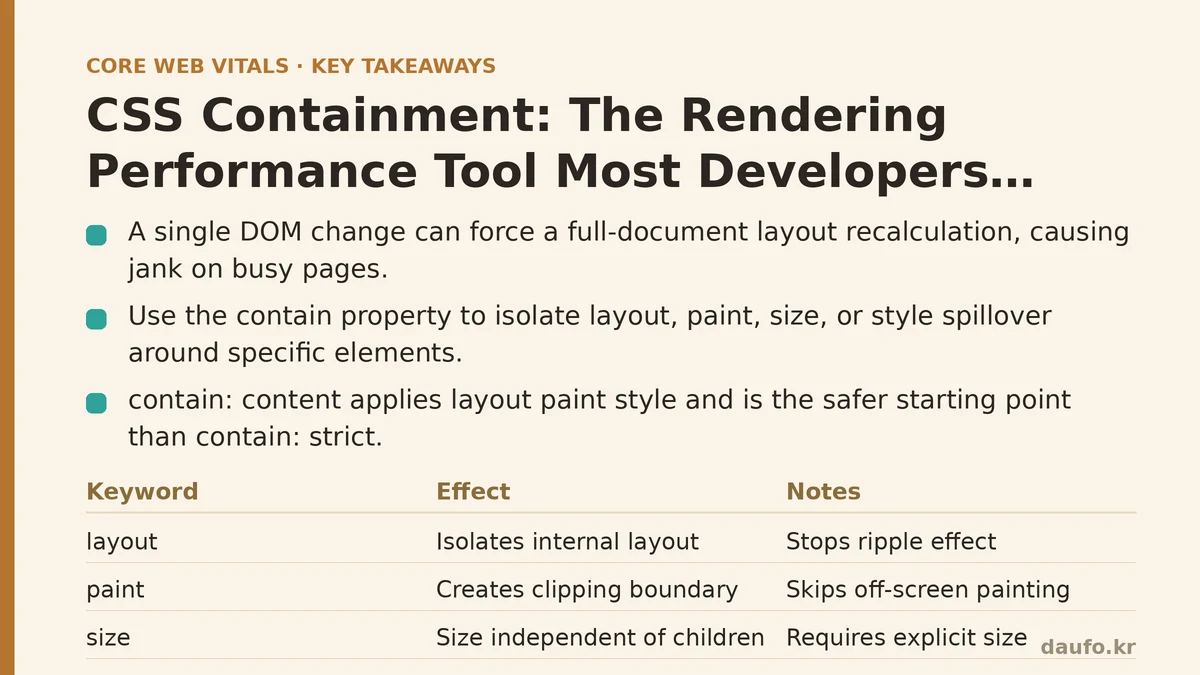
The contain property accepts one or more of four keywords, each restricting a different kind of spillover:
.widget {
  contain: layout paint size style;
}
layout— The element’s internal layout is isolated from the rest of the page. Nothing inside it can affect the layout of elements outside it, and vice versa. This is the keyword that stops the ripple effect described above.paint— The element becomes a clipping boundary. Nothing inside it paints outside its bounds, and the browser can skip painting the element’s contents entirely if it’s off-screen.size— The element’s size is determined without looking at its children’s content. This requires you to specify a size (via CSS orcontain-intrinsic-size), because the browser will not measure the content to figure out how tall the box should be.style— Certain CSS counters and quotes are scoped to the element, preventing them from affecting elements outside it. This one matters less for performance and more for correctness in edge cases.
There’s also a shorthand: contain: strict applies layout paint size, and contain: content applies layout paint style (without forcing a fixed size). In most real projects, content is the safer starting point, since strict demands that you get sizing right immediately or you’ll see collapsed elements.
Step 3: Apply contain: content to Independent UI Blocks
Look for repeating, self-contained components: cards in a grid, list items in a feed, comment blocks, sidebar widgets. These are ideal candidates because they don’t need to influence layout outside their own box.
.feed-item {
  contain: content;
}
Apply this and re-run the Performance recording from Step 1. In testing across list-heavy pages, adding contain: content to repeated item components has reduced layout recalculation time by a significant margin when updates happen inside a single item, because the browser no longer needs to check whether that change affects siblings or ancestors.
One caveat: contain: layout (and therefore content) creates a new containing block and a new stacking context, similar to setting position: relative combined with overflow: hidden in terms of side effects. Test components that rely on absolute positioning relative to an ancestor further up the tree, since containment may change which element that positioning resolves against.
Step 4: Use content-visibility: auto for Off-Screen Content
Containment alone tells the browser what can’t leak out. content-visibility goes further and tells the browser it can skip rendering work entirely for elements that aren’t currently visible.
.section {
  content-visibility: auto;
  contain-intrinsic-size: auto 500px;
}
With content-visibility: auto, the browser skips layout, paint, and even most style work for the element’s descendants when it’s off-screen, only doing that work as the element approaches the viewport. This is distinct from display: none, which removes the element from rendering but also loses its size and accessibility semantics; content-visibility: auto keeps the element measurable and present, just deferred.
This is where the biggest wins tend to show up on long pages: articles with many sections, long settings pages, infinite-scrolling feeds rendered without virtualization. Applying content-visibility: auto to below-the-fold sections has, in measured cases, cut initial rendering time substantially on pages with hundreds of off-screen elements, since the browser no longer does full layout and paint work for content the user hasn’t scrolled to.
Step 5: Set contain-intrinsic-size to Prevent Layout Shift
Skipping rendering work for off-screen content only works if the browser knows roughly how tall that content will be once it’s rendered. Without a size hint, an element with content-visibility: auto collapses to zero height while off-screen, and expanding to its real height as it scrolls into view causes a visible layout shift — directly hurting Cumulative Layout Shift.
.comment-thread {
  content-visibility: auto;
  contain-intrinsic-size: auto 800px;
}
The auto keyword in contain-intrinsic-size: auto 800px tells the browser to remember the element’s last rendered size and use that as the placeholder size going forward, which is more accurate than a fixed guess for content whose height varies. For a first pass, estimate the average height of the component type and use that as your fallback value; refine it once you’ve measured actual rendered heights across a representative sample of content.
Skipping this step is the most common mistake teams make when adopting content-visibility. The rendering savings are real, but they arrive bundled with a CLS regression if sizing isn’t handled deliberately.
Step 6: Measure the Effect With DevTools and Real User Data
Containment changes are easy to apply and easy to verify wrong assumptions about, so measurement matters at every stage:
- Performance panel, before and after. Record the same interaction or page load with and without the containment rules, and compare the total time spent in “Layout” and “Recalculate Style.”
- Rendering tab. Enable “Layout Shift Regions” and “Paint flashing” to visually confirm that containment boundaries are behaving as expected and that no unexpected repaints are spreading outside contained elements.
- Core Web Vitals in the field. Watch CLS and INP in your real-user monitoring after shipping
content-visibilitychanges specifically, since the sizing issue from Step 5 often only shows up under real network and device conditions, not in a quick local test.
Treat this as an iterative process rather than a one-time fix: apply containment to one section of the page, measure, adjust the intrinsic size estimate, and move to the next section.
Step 7: Know Where Containment Doesn’t Help
Containment is not a universal fix, and applying it indiscriminately across a page adds complexity without benefit in several situations:
- Small, simple pages. If a page has a few dozen DOM nodes total, there’s little ripple effect to prevent, and the measured gains will be negligible.
- Elements whose size depends on external layout.
contain: sizeand the sizing requirement ofcontent-visibilityconflict with components meant to grow or shrink based on their content (a text area that expands with input, for instance). - Deeply nested containment. Wrapping every element at every level in
contain: contentdoesn’t compound the benefit; it mainly adds maintenance overhead. Apply it at the boundary of meaningful, independently-updating components, not everywhere.
The goal is to identify the handful of components on a page that update frequently or independently, or the sections that sit far below the fold, and contain those specifically.
A Quick Checklist Before You Ship
- Does the component update independently of its siblings? → Add
contain: content. - Is the section reliably off-screen on initial load? → Add
content-visibility: autowith acontain-intrinsic-sizeestimate. - Have you re-measured CLS after adding
content-visibility? → Do this before considering the change complete. - Does anything rely on absolute positioning against an ancestor outside the contained element? → Verify it still resolves correctly.
Run through that list on your busiest, most DOM-heavy page first. It’s usually where CSS containment pays for itself fastest, and the results in the Performance panel will tell you immediately whether the boundaries you drew were the right ones.
Related guides: Performance Budgets, Ranked: The 5 Metrics Worth Enforcing (and How to Do It), The DOM Size Myth: Why ‘Fewer Divs’ Isn’t the Real Performance Fix, and Variable Fonts: One File, Infinite Possibilities for Performance and Design.
🔗 Recommended Reading
- How to Enable Browser Caching on Your Website: A Beginner's Step-by-Step Tutorial
- Web Performance Monitoring Tools Compared: Lighthouse, PageSpeed Insights, and WebPageTest
- CDN vs. Origin Server: Which to Optimize First for Latency
- Common Mistakes That Break Web Font Performance and How to Fix Them
- Site Speed Optimization for Fintech Websites: Balancing Security, Compliance, and Performance